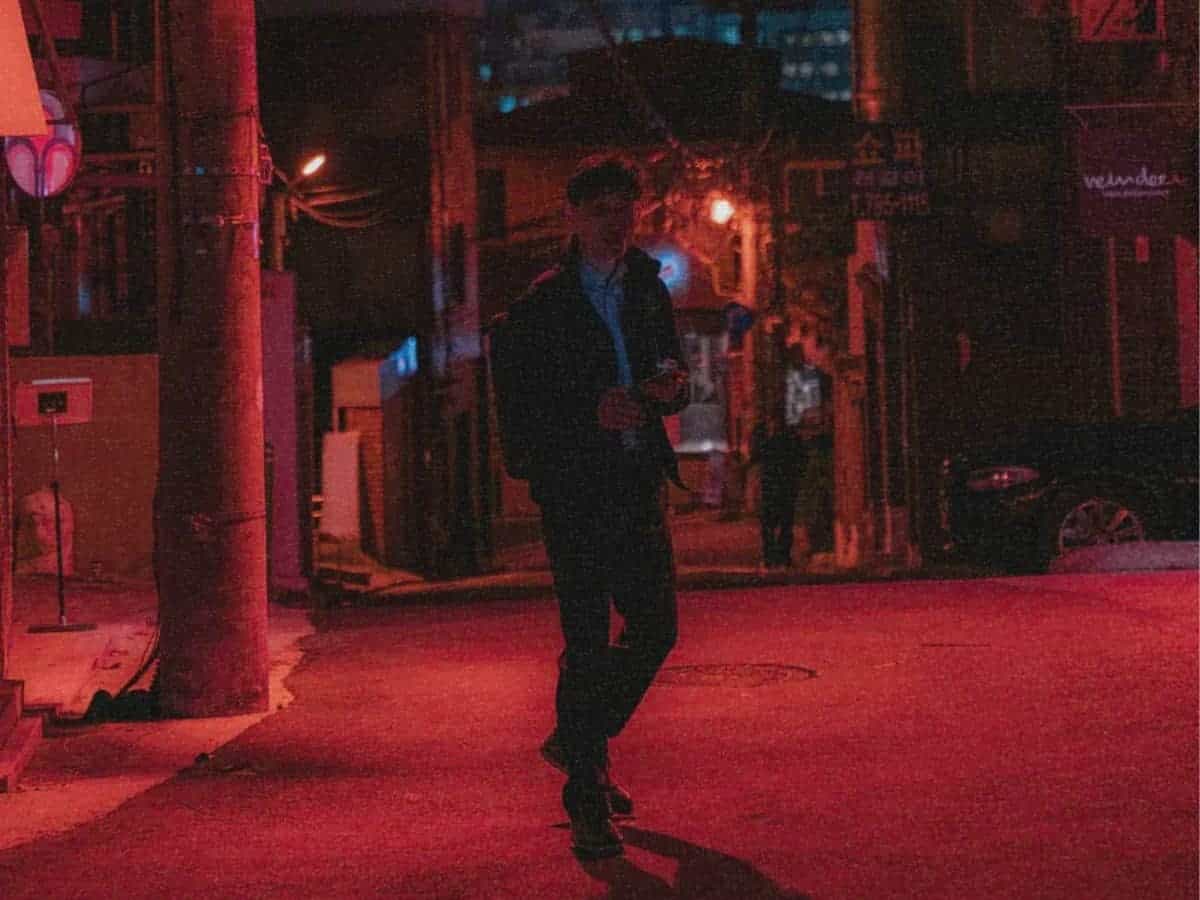
Grainy pictures can be aesthetic. When it’s not intentional, it can ruin a photo. Learn what it is, along with how to prevent and remove it.

What’s grain in photography?
Have you seen an image that has small dots or specks all over it? That’s grain.
However, grain is a term that comes from film photography. In digital photography, it’s called noise.
Related: Understanding ISO in digital photography
It’s a type of visual distortion that can look good if you’re trying to make it look like you shot with a film camera.
Otherwise, it creates an unpleasing image.
Related: Back-button focus: What it is and how to use it
To an extent, grainy photos can be fixed. However, it’s more important to learn what it is and how to prevent it.
The cause of grainy photos

If your photography involves low light, you’ll encounter grainy photos and noise. It’s a fact of low-light photography.
Related: 10 best apps to fix blurry photos
Digital noise is caused by various factors. They’re as follows:
High ISO
A high ISO is the most common reason that a photo turns out grainy or noisy. It can happen regardless of the camera you have.
Some cameras have better high ISO performance than others, but at a certain point, the noise is visible.
ISO is also called ASA. It originates from film photography, as it referred to the film’s sensitivity to light.
Related: 6 best instant cameras
In digital photography, it refers to the sensor’s sensitivity to light.
A lower number means the sensor or film is less sensitive to light, while a higher number means it’s more sensitive.
The higher it becomes, your images will have more noise, grain, and less dynamic range.
Small sensor size
Another possible cause for grainy photos is your camera’s sensor size.
A smaller sensor size increases the likelihood of noise and grain in your photo. If your camera has a small sensor, you may see noise at ISO 400.
Cameras with larger sensors will perform better than those with small sensors.
Larger sensors contain millions of spots that are sensitive to light. It allows them to perform better with a high ISO.
Underexposure
With a low ISO and a large camera sensor, you’ll eliminate most causes of grain. However, it’s still possible.
If you’re experiencing grainy photos even with a low ISO, it’s likely due to underexposure.
When you increase the exposure in post-processing or lift the shadows, it’ll reveal noise. That’s why proper exposure is important.
Related: Documentary photography: Tips for taking compelling photos
Even if you don’t see the noise in the shadows of an underexposed image, you’ll find it later when you brighten it.
Noise from an underexposed photo can be worse than increasing the ISO. So, do your best to nail the exposure.
How to prevent it

Instead of focusing on fixing a grainy photo, work on preventing it.
Related: How to create rim lighting
When you prevent digital noise from the beginning, you’ll achieve better results and higher-quality images.
It’ll also save you time. So, use the following tips to prevent grainy photos.
Use the lowest ISO possible
Higher ISOs create more noise. So, using the lowest ISO possible will prevent grainy photos.
With newer and higher-quality cameras, you can get away with an ISO of 400 or 800. However, it depends on your camera.
Regardless, use the lowest possible ISO to get the best results.
Use a large aperture
If you’re unable to use a lower ISO, you need to find ways to increase the light.
One of the best ways to do it is to use a larger aperture. Lenses that have maximum apertures of f/1.4 to f/2.8 perform well in low light.
So, use the largest aperture possible to let in more light.
The biggest change is that the depth of field will become shallower. Keep that in mind as you change the aperture.
In-camera noise reduction
Most digital cameras have a noise reduction setting that you can turn on. The only downside is that it may require shooting a JPEG instead of RAW.
DSLR cameras are also more flexible when it comes to in-camera noise reduction.
Typically, it’ll allow you to use a high or low setting, whereas most compact cameras only offer on or off.
Whether you have a DSLR or compact camera, in-camera noise reduction is an excellent option to reduce grainy photos.
Shoot in RAW
RAW files are uncompressed and maintain a lot of image quality. It gives you more power when it comes to editing the photo.
Shooting in RAW won’t eliminate grainy photos. However, it’ll capture high-quality photos and be more flexible with post-processing.
Find light

In conditions with low light, you’ll get grainy photos. Instead of increasing the ISO, find more light.
You can use artificial light, such as a constant light or flash. You can also find street lights or store windows, which offer more light.
Whether you use artificial light or find another light source, you’ll be able to use a lower ISO and prevent noise in your photos.
Slightly overexpose the photo
Underexposure is one of the main causes of grainy images. That’s why slightly overexposing the photo is an excellent and effective solution.
To increase the exposure, you need more light. So, you can increase the aperture by one or more f-stops based on how much light you need.
You can also slow down the shutter speed but watch out for blurry images. If it’s too slow, you’ll need a tripod for stability.
If you’ve already increased the aperture and slowed down the shutter speed, increase the ISO.
Often, an increase in the ISO is better than lifting the shadows in post-processing for grainy photos.
Fixing grainy photos
If you’ve done all that you can to prevent it, you can still get a grainy photo but don’t worry. There are ways to fix and minimize it.
Related: How to take amazing group photos
Photoshop, Lightroom, and other editing software offer ways to reduce the noise in a photo. If you don’t have Lightroom or Photoshop, you can get both in Adobe’s Creative Cloud suite of tools.
Lightroom
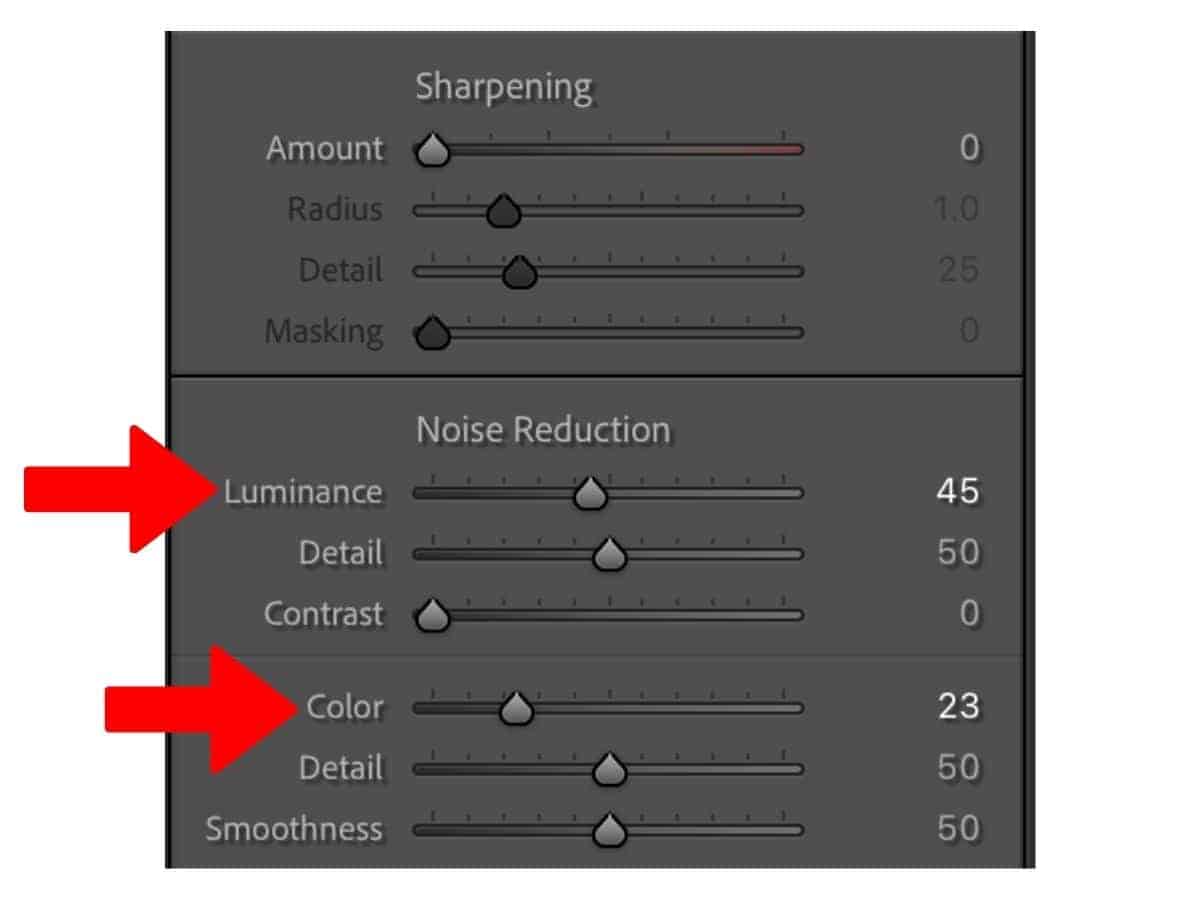
Lightroom makes it easy to reduce the noise in your photo. However, too much noise reduction can result in a loss of detail. So, be careful with it.
Take the following steps to reduce noise by using Lightroom:
- Open Lightroom.
- Import your photo.
- Select the Develop module.
- Open the Detail section on the right-side panel.
- Under Noise Reduction, pull the Luminance slider to the right as much as desired.
Note: If there’s also color noise, you can adjust the color slider to reduce it.

Photoshop
Photoshop is the older sibling of Lightroom. It’s more powerful, offers endless creative solutions, and is the most well-known editing software.
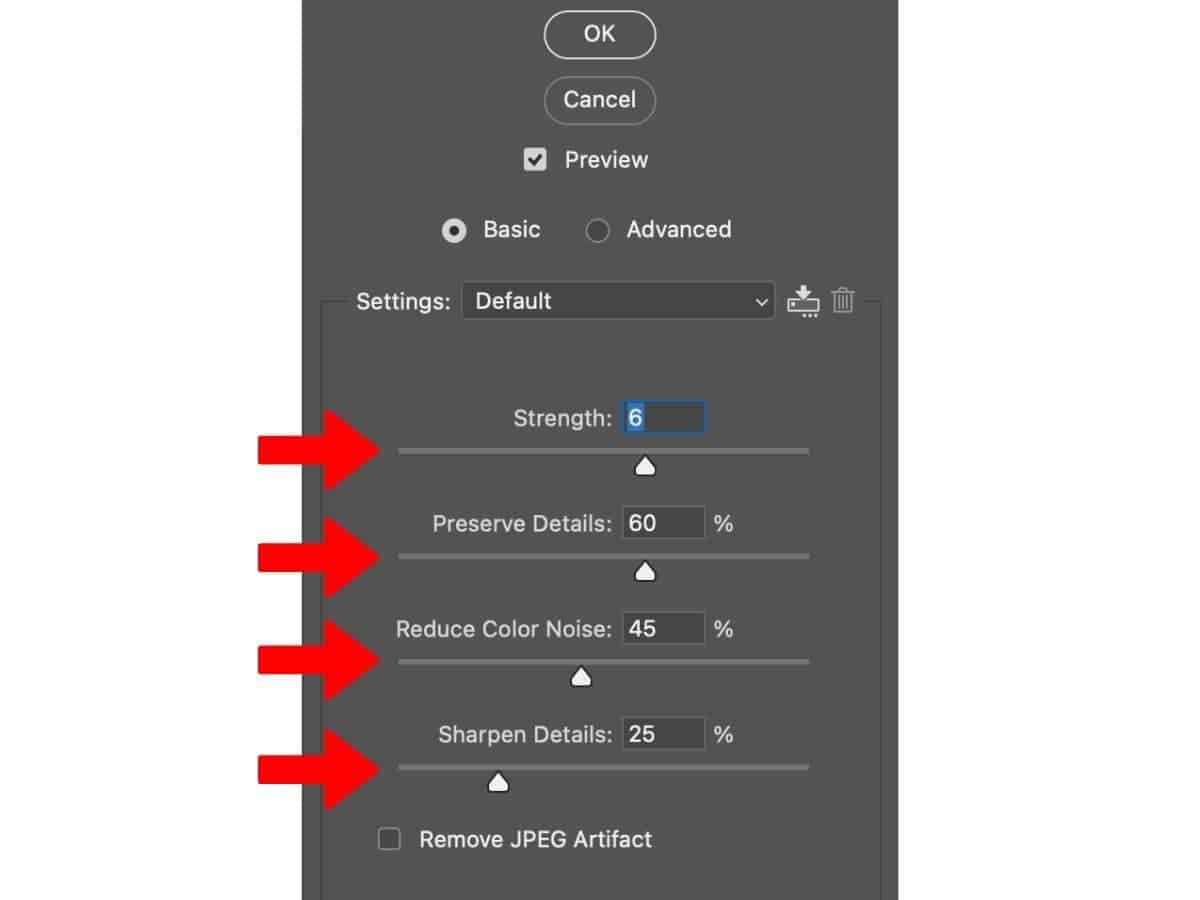
To reduce noise in Photoshop, take the following steps:
- Open Photoshop.
- Import your photo.
- Click the Zoom tool or press Z and zoom into your photo to see the noise.
- Click Filter in the menu bar.
- Hover over Noise.
- Click Reduce Noise.
- Adjust the settings as desired.
- Click OK.

Other tools and software
Lightroom and Photoshop are the most popular tools for photo editing.
However, there are other options. You can use CaptureOne, Luminar from Skylum, your smartphone, and phone apps.
On an iPhone, you can open a photo and click the edit button. There’s a setting for noise reduction.
Aside from the Adobe apps, you have plenty of options. The key is to find the noise reduction feature and make the adjustments.
Related: 7 ways to take better pet portraits
Frequently asked questions
What’s the difference between luminance noise and color noise?
Luminance noise looks similar to film grain and is caused by poor ISO performance. Color noise looks like bright and discolored pixels. It’s a result of an overheated sensor. Both are types of digital noise that can be reduced or fixed in post-processing.
Are there any other ways to remove grain aside from noise reduction?
Yes, another way to remove noise is to smoothen the image. You can pull the clarity or texture slider to the left. Be careful, as it can easily become overdone, and your image can look fake.
Why are my indoor photos grainy?
If your indoor photos are grainy, it’s because there’s not enough light. When your photos are underexposed, they’ll be grainy, and if you edit them, you’ll see grain and noise clearly in the shadows. So, aim to have a balanced exposure or make it slightly overexposed.
Conclusion
Understanding how grain and noise occur is essential for a photographer. By knowing how to prevent and fix it, you can take high-quality low-light photos.
Featured image courtesy of Unsplash.

