The blue hour refers to a time that typically happens twice a day. Either right before the sun rises or after the sun goes down.
The blue hour is a beautiful time of the day. It’s also an excellent time to take photos, as it results in powerful and interesting images.
Related: Landscape vs. portrait orientation in photography
Learn everything you need to know about the blue hour, including tips to take incredible photos during it and what camera settings you should use.
What’s the blue hour?
The blue hour occurs twice a day, as long as it’s not too cloudy. It occurs right before the sun rises and right after it sets.
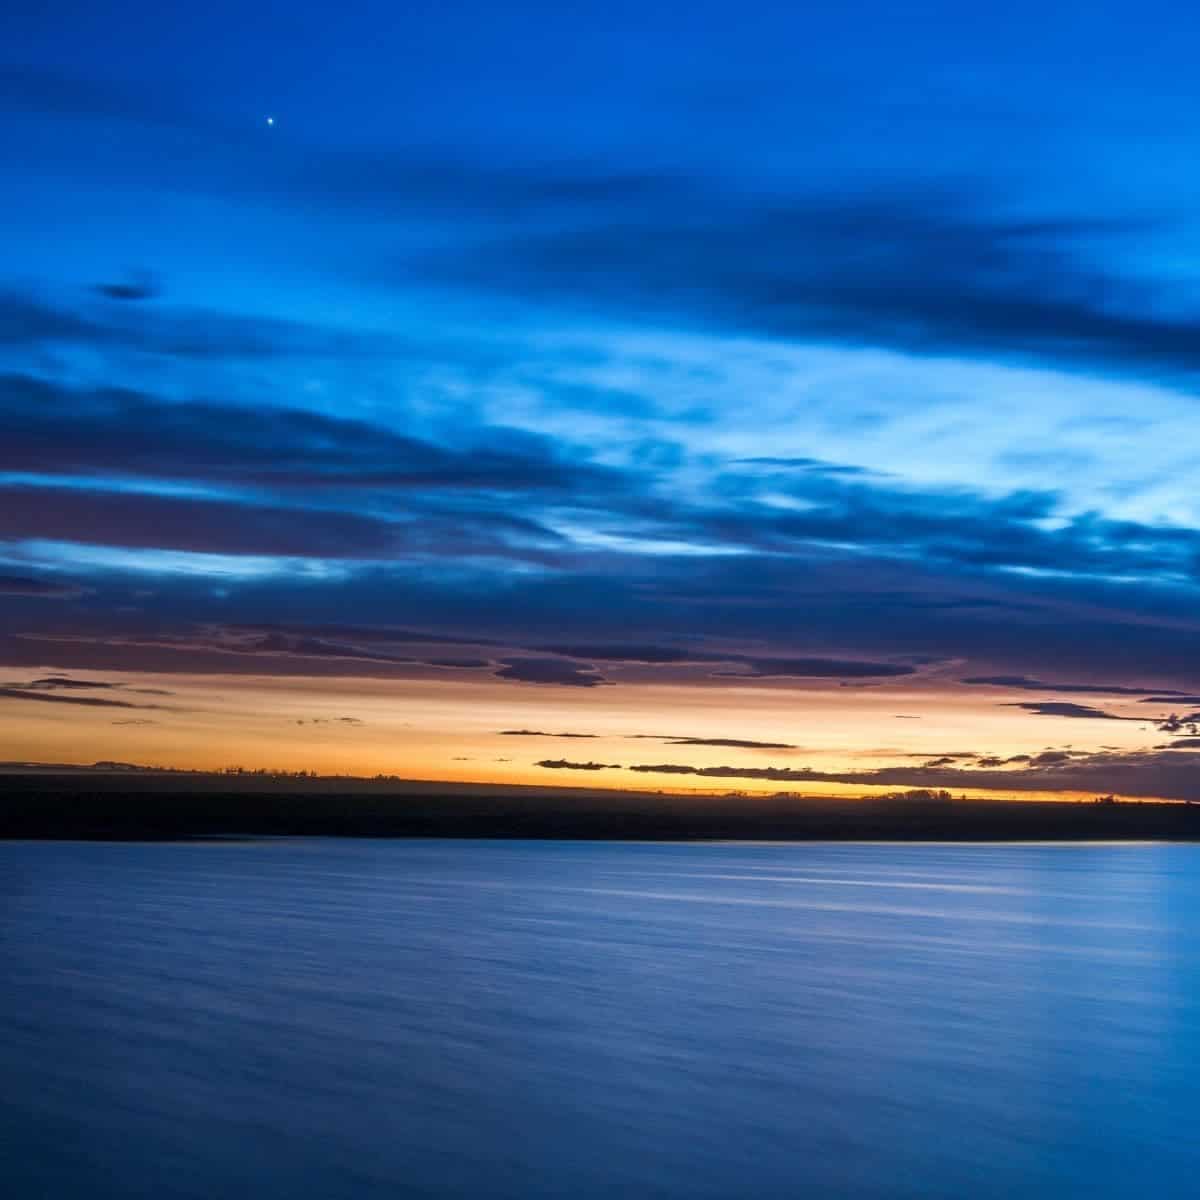
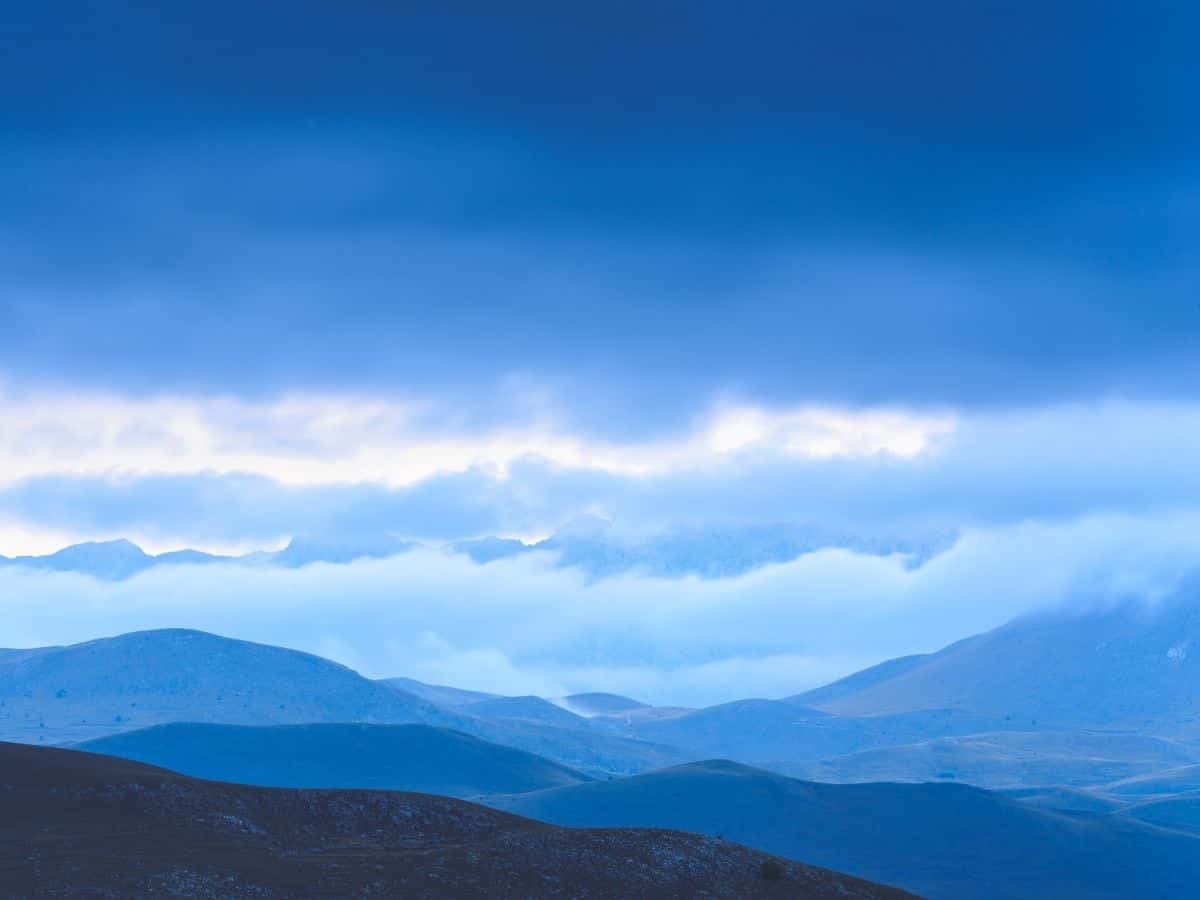
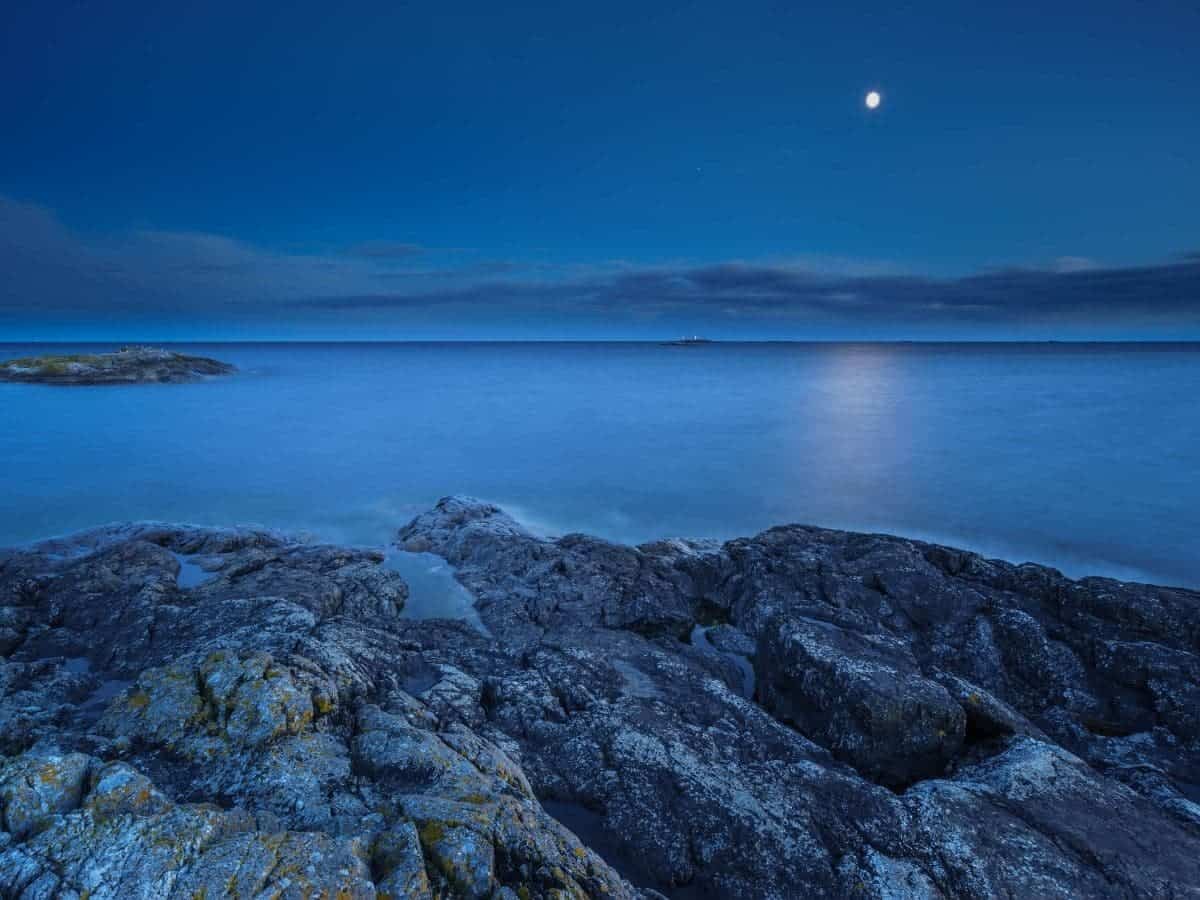
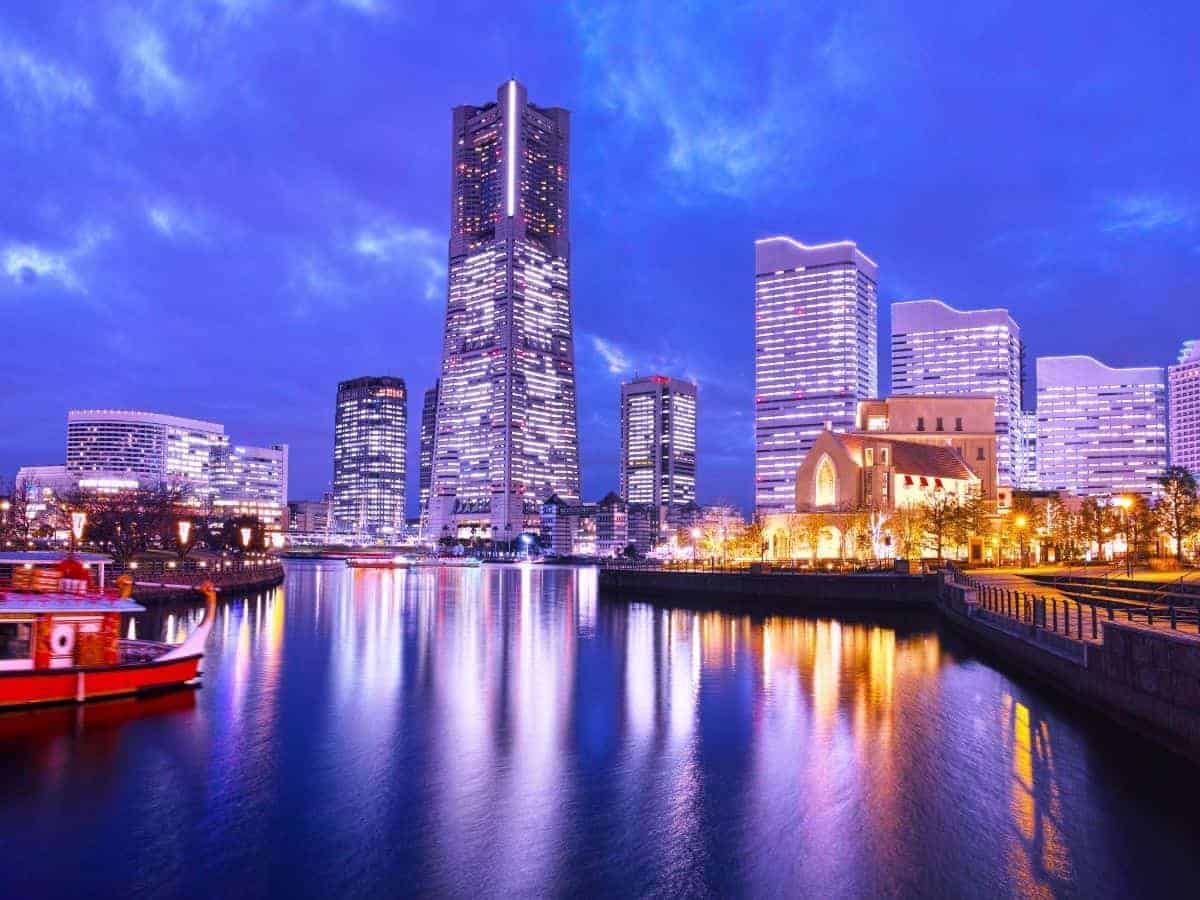
During the blue hour, the sky becomes a deep and dark blue color. Plus, everything around you has a blue tint.
The blue tint everywhere is due to the sun’s position.
Related: The difference between vibrance and saturation
When the sun is at a specific distance below the horizon, you can only see blue light, as it has short wavelengths.
It then spreads in the atmosphere, which is why you see the color blue.
While it’s called the blue hour, it doesn’t actually last an hour. Instead, it’s about 20 to 30 minutes.

For example, say the sun sets at 7 PM. The blue hour would then occur from around 7:10 PM to 7:30 PM.
The exact duration can change depending on where you are, the time of year, and the weather. So, it can be longer or shorter.
Regardless of the duration, the blue hour provides a bluish hue everywhere, which is a great sight and results in beautiful photos.
An excellent time for photography
Most people know about the golden hour. More so, most photographers pack up and leave after the golden hour.
However, the blue hour is an underrated time for photography. Few people know about the incredible photos that can be taken during it.
While it’s often forgotten, start keeping an eye out for the magical and serene blue hour. You can capture photos that have a cool and peaceful feeling.
Related: What’s texture in photography?
The blue hour offers endless creative possibilities. During it, you’ll see the colors shift through many shades of blue.
Since the sun has gone down, it also provides soft light, which is great for portraits and landscapes alike.
If you aren’t taking photos during the blue hour, start now.
Recommended camera settings
Before you start taking photos during the blue hour, find out what the best camera settings are. Due to the blueness of everything, your camera settings play a big role in the result.
Like any other time of the day, focus on nailing the exposure. It can be more difficult during the blue hour because everything is blue and darker.
So, you’ll have to increase your ISO, use a long exposure, or a larger aperture. The exact settings depend on the type of photography you’re doing.
If you’re snapping portraits, slow shutter speeds may result in a blurry subject. Instead, use a large aperture of f/1.8 or larger.
If your lens doesn’t offer that large of an aperture, use the maximum it has. Then, you can increase your ISO.
Related: What’s a telephoto lens, and is it worth it?
Keep in mind that a higher ISO number results in a grainier photo.
If possible, use artificial light to correctly expose your subject without increasing the ISO.
If you’re photographing landscapes, you have more flexibility.
During the blue hour, focus on slow shutter speeds. It’ll produce beautiful photos that smoothen movement.
Be sure to bring a tripod, as it’ll capture the highest quality image without any camera shake.
With a tripod, use the base ISO, which is typically 100. Then, the aperture depends on the depth of field you’d like. So, that’ll be up to you.
With shutter speed, slow it down until the exposure is perfect.
Aside from the aperture, shutter speed, and ISO, change the white balance to capture an accurate image.
You can even make it a bit cooler to enhance the blueness.
Blue hour photography tips
Now you know what the best camera settings are for blue hour. Next, learn essential tips that’ll help you capture incredible photos.
Overall, shooting in the blue hour is easier because you don’t have to worry about harsh lighting or shadows.
Related: What do STM and USM mean on Canon lenses?
The hardest aspect is ensuring that you’re there for it because it’s easy to miss.
The following are must-follow tips to capture beautiful blue hour photos.
1. Give yourself plenty of time beforehand
The blue hour can go by quickly. So, make sure you give yourself plenty of time to prepare.
Arrive at a location early to look around and find the perfect composition.
It also gives you time to set up your equipment, find the right settings, and watch the light transform.
Whether you’re catching the blue hour in the morning or evening, it’s a magical and serene sight.
2. Use artificial light
Without the sun, it’ll be darker. So, you may need artificial light depending on what you’re photographing.
For landscapes, you won’t need artificial light, but you may for portraits.
Unless you’re capturing a silhouette of your subject or plan to use a higher ISO, use artificial light.
It’ll provide ample light to perfectly expose your subject during the blue hour.
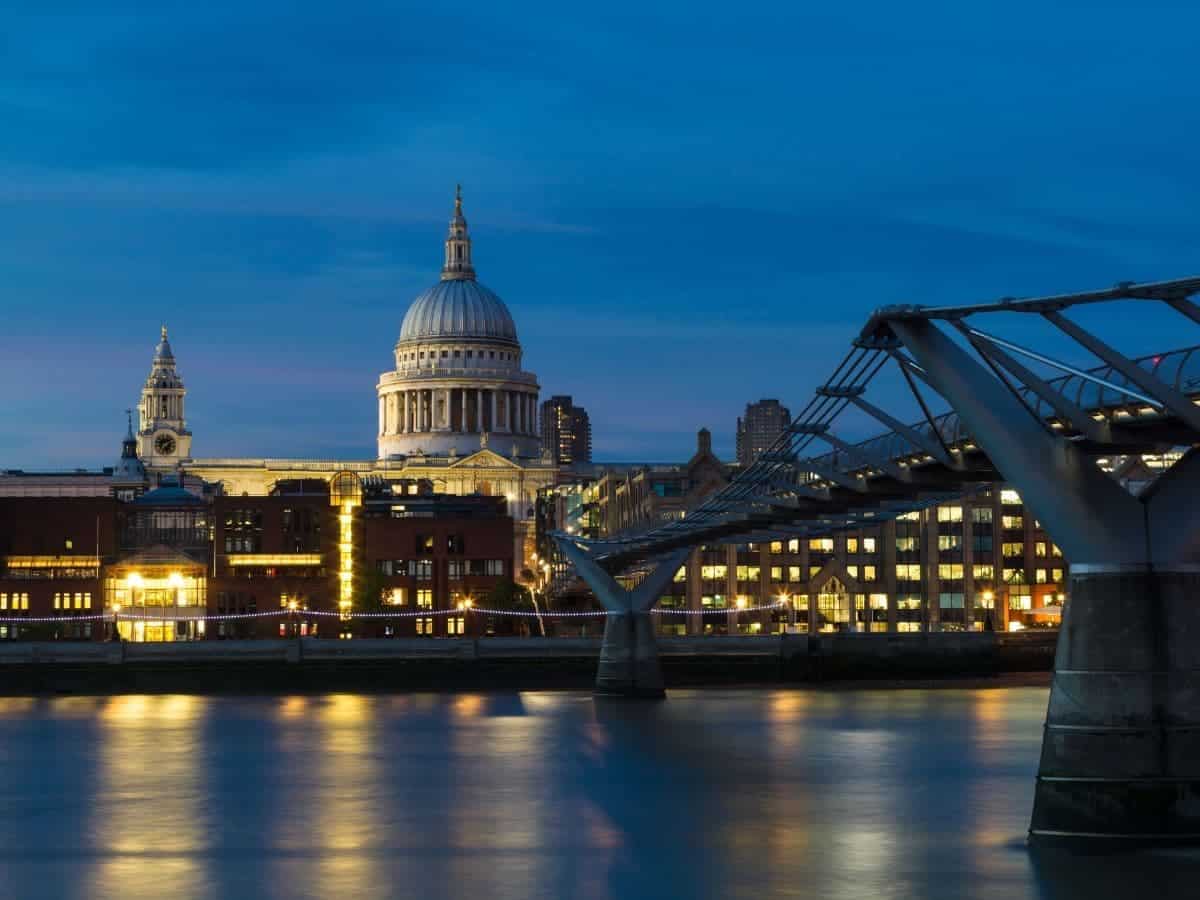
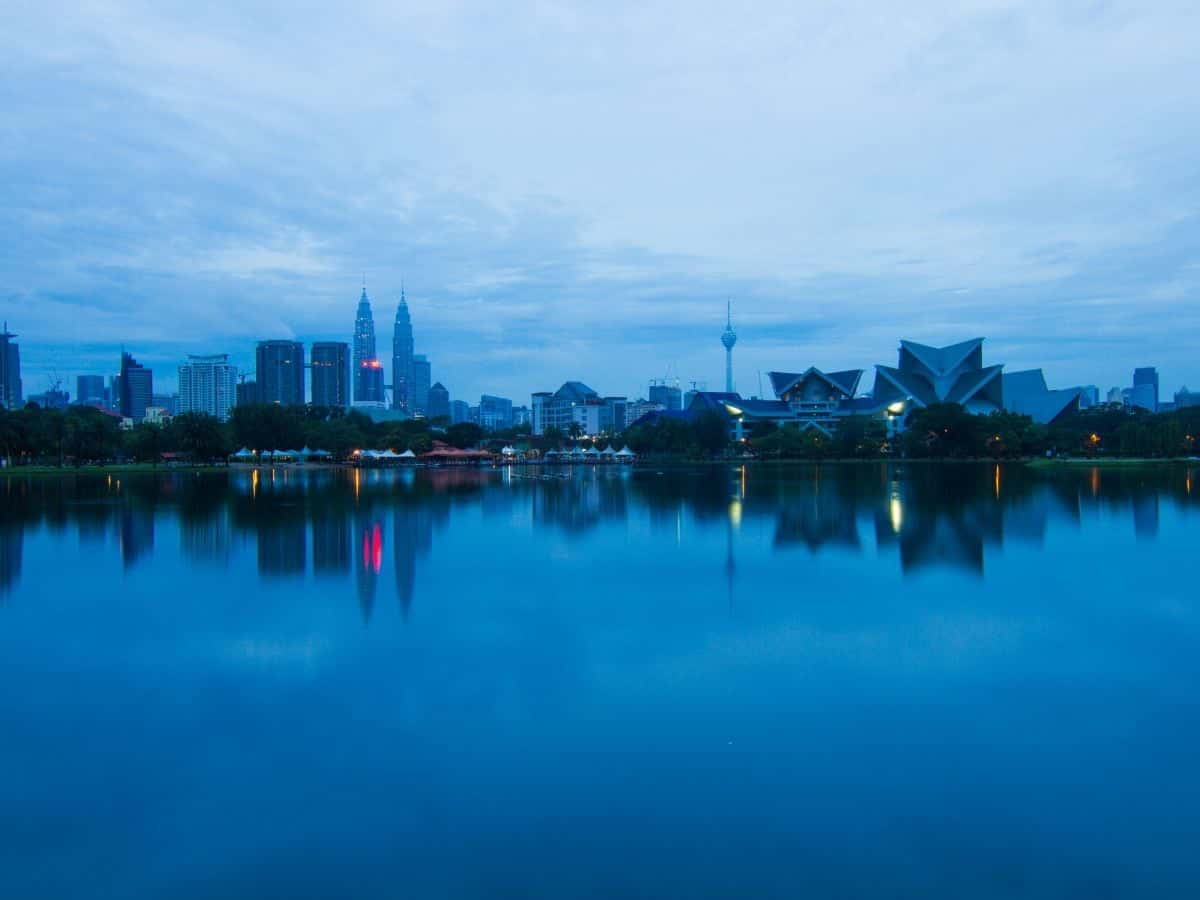
3. Capture lights and reflections
Lights and reflections are a few of the best things to photograph during the blue hour.
With a blue hue all around, orange and yellow lights provide color harmony, as they’re complementary. The colors will pop and create a visually appealing photo.
If you’re near water or windows, capture reflections, too.
4. Shoot in RAW
It’s best to set your camera to capture RAW files because it gives you the highest quality.
Aside from quality, it’ll gather the most detail and be unprocessed.
You’ll be able to make adjustments in post-processing without worrying about losing details or quality.
5. Capture movement
A low shutter speed helps with capturing a brighter image. However, it also results in a photo with motion blur.
Instead of looking at it as a downside, get creative with motion. You can capture a light trail from cars, the clouds in the sky moving, or smooth out the waves in the water.
By capturing movement during the blue hour, you’ll have an even better photo.
6. Expose for the mid-tones
During the blue hour, exposure can be tricky. While you can correct the exposure in post-processing, do your best to get it right in-camera.
If you expose for the highlights, the shadows will be too dark. If you expose for the shadows, the highlights may be too bright.
So, the best thing to do is expose for the mid-tones. It’ll maintain detail in the shadows and highlights, which can be increased or decreased in post-processing.
Aside from exposing for the mid-tones, take multiple exposures or HDRs. By taking multiple photos with different exposures, you can merge them in post-processing to create the perfect image.
7. Use a tripod and remote shutter release
A tripod ensures that your camera is stable. When you’re using slow shutter speeds, it keeps your images from getting blurry.
If you’re using a really slow shutter speed, bring a remote shutter release. By pressing a button without touching the camera, you eliminate all possibilities of an unwanted blur.
When you use both together, you get a high-quality photo.
Post-processing blue hour photos
In most cases, you want the blueness to shine in your blue hour photos. There are a few things you can do in post-processing to enhance the images.
Related: 5 essential editing tips for beginners
First, you can keep it minimal by revealing more of the shadows and decreasing the highlights. Then, adjust the exposure to be balanced.
Other options include adjusting the colors and contrast. Regardless, make sure the exposure is balanced and that you can see the blue. Everything else is up to you.
What to photograph during the blue hour
If you need inspiration and ideas for photos during the blue hour, try any of the following:
- City skylines.
- Portraits.
- Mountains and nature.
- Beaches and bodies of water.
- Roads.
- Buildings and architecture.
- Cars.
- Bridges.
- The sky.
Since the blue hour is such an amazing time to take photos, enjoy it with a few other photographers. You can get creative and bounce ideas off of each other.
Conclusion
If you haven’t taken photos during the blue hour, start now. The photos you take will be dramatic and look beautiful. Follow the tips you learned today and enjoy capturing amazing pictures in soft light.
Featured image courtesy of Canva.