Layers are an important part of post-processing and will help you perfect an image. Learn what layers are and how to use them.
What are Photoshop layers?
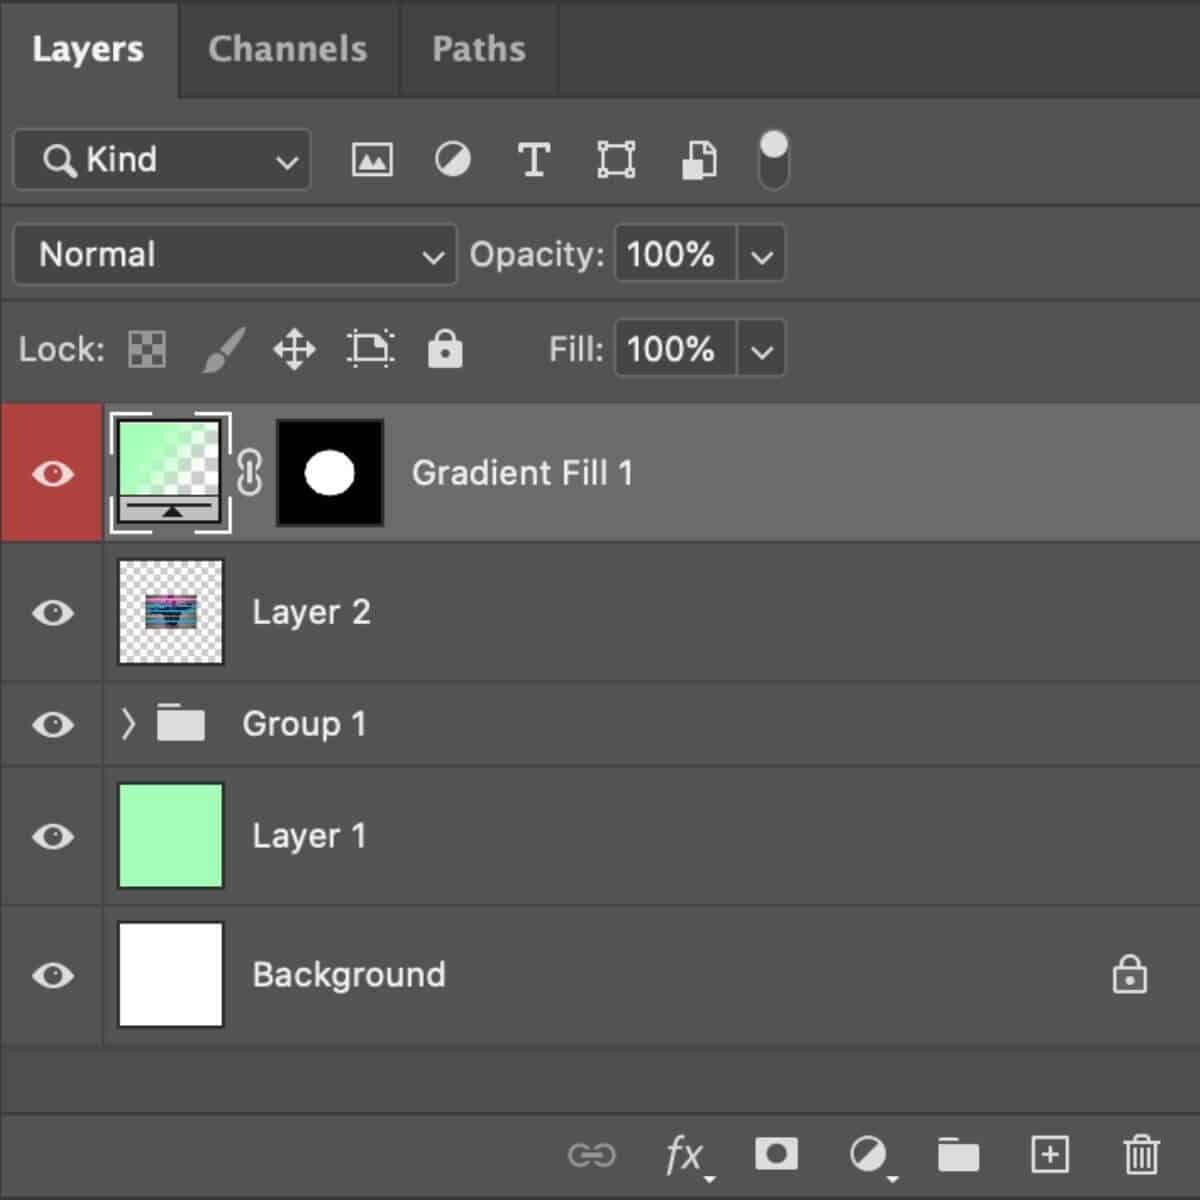
Layers are essential in Photoshop because they allow you to stack images on top of each other. This allows you to blend images, create effects, logos, and make edits.
Related: How to fix overexposure in Lightroom
In Photoshop, the Layers panel is at the bottom right. There are three tabs: layers, channels, and paths.
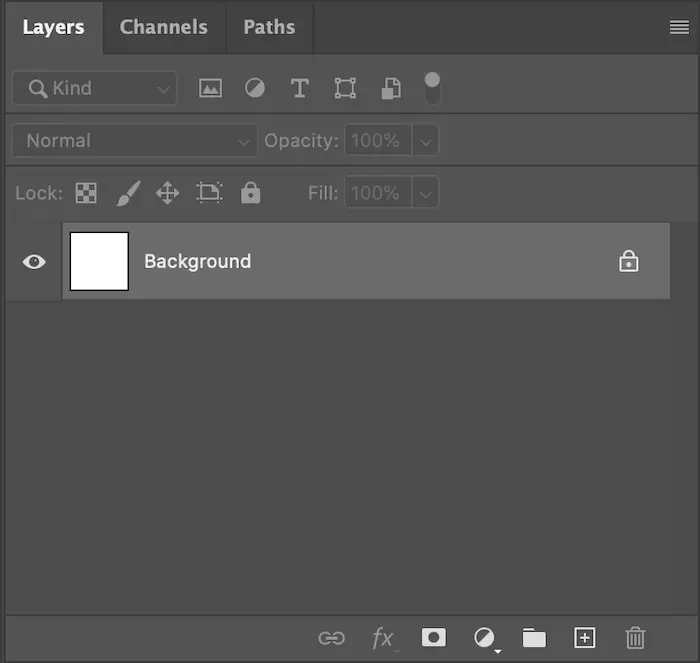
The panel in Photoshop is a powerful tool because you can apply different filters, blend modes, change the opacity, and add masks.
Additionally, you can group layers, create new ones, or delete them by using the panel.
Layers allow you to combine multiple images, add text, shapes, effects, and draw on an image.
Another benefit of using layers is that it’s non-destructive because you aren’t mixing pixels or interacting with the other layers.
Each one is separate, and if you don’t like one, you can delete it without starting from scratch.
Related: How to remove a background in Photoshop
Types of layers
The following are the different types of layers in Photoshop and what they do:
1. Image layers. You can add as many images as you’d like. Each image will be a different layer. Therefore, the edits you make to one won’t transfer to the other images.
2. Adjustment layers. When you change the exposure, contrast, curves, or HSL sliders, you’re adding an adjustment layer with each change.
As you apply these changes, you’ll notice that it’s only changing the layers below the adjustment layer and not any of the ones above it.
To see the difference that an adjustment makes, deselect the eye because it’ll show you the image without the edit.
3. Vector layers. Instead of being an image or a change to the image, a vector layer involves adding shapes or text.
4. Fill layers. If you add a solid color, gradient, or pattern, it’s considered a fill layer. This will allow you to change the feeling of the image, such as making the color temperature warmer or cooler.
Basics of using layers
Your first layer will be the background layer, and unless you unlock it, it’ll be locked. The background layer can be an image or a solid color. However, you won’t be able to move it around or edit it without unlocking it.
Related: What’s cropping in photography?
If you want to unlock the background, click the lock icon that’s on the right side of the layer. It’ll become “Layer 0” as soon as you press it.
Opening a new layer
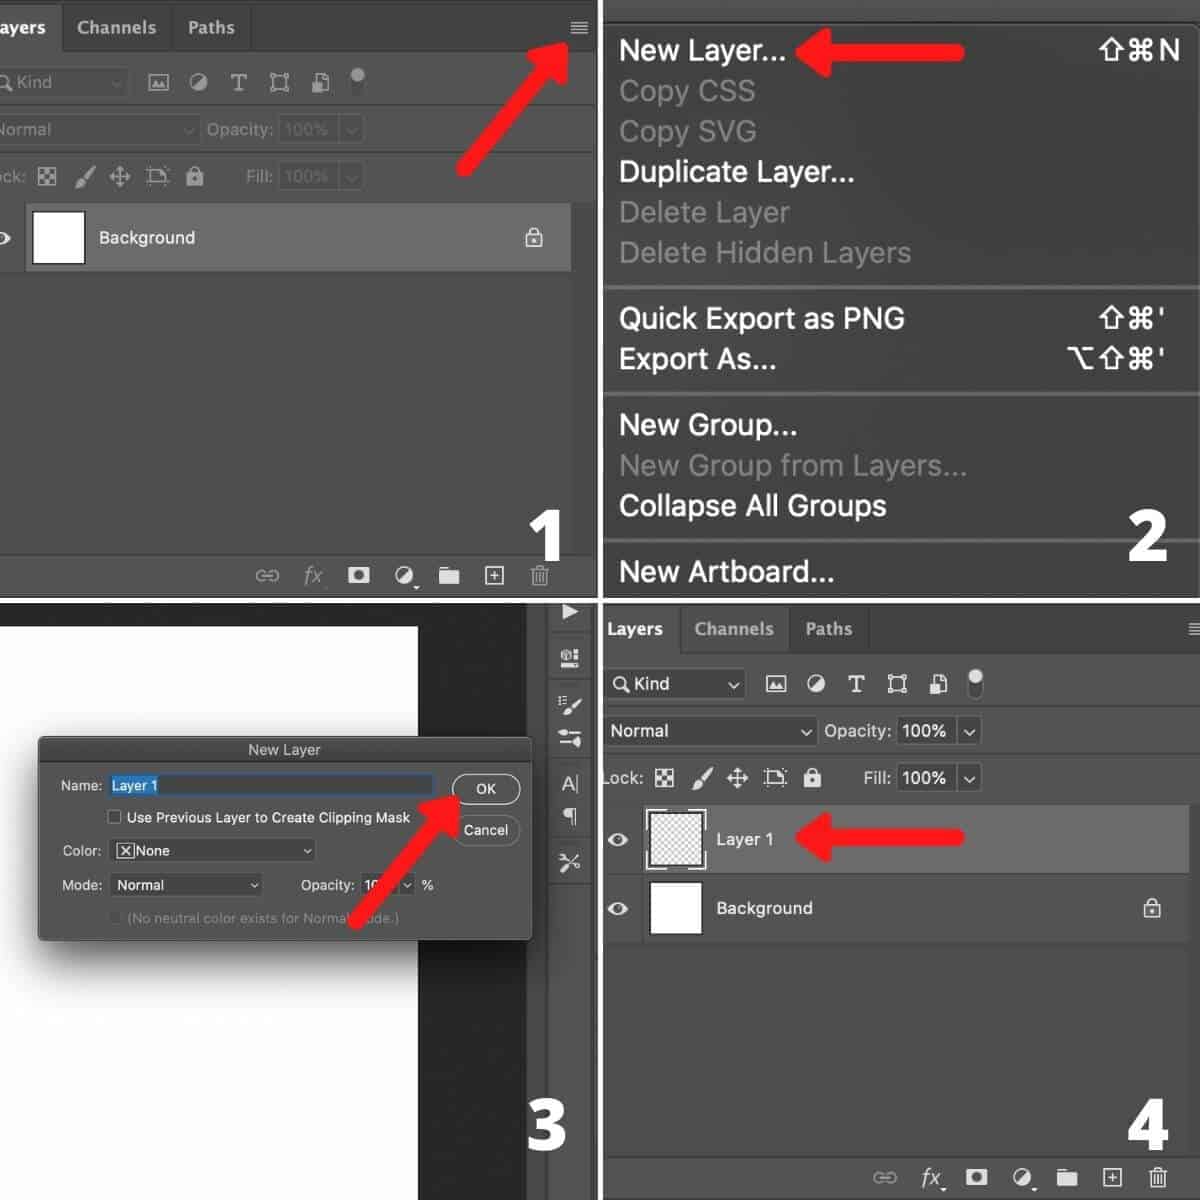
You can open a new layer by using the Layers panel, clicking Layer at the top, the plus symbol at the bottom right (this is the fastest way), or pressing Shift+Command+N on a Mac or Shift+Control+N on Windows.
To use the Layers panel, take the following steps:
- Press the hamburger button, which are the three parallel horizontal lines.
- Select New Layer.
- Name your layer, and press the OK button.
- Now, your new layer is open and selected.
Note: To select another layer, click on the grey box that holds the layer.
Hiding a layer
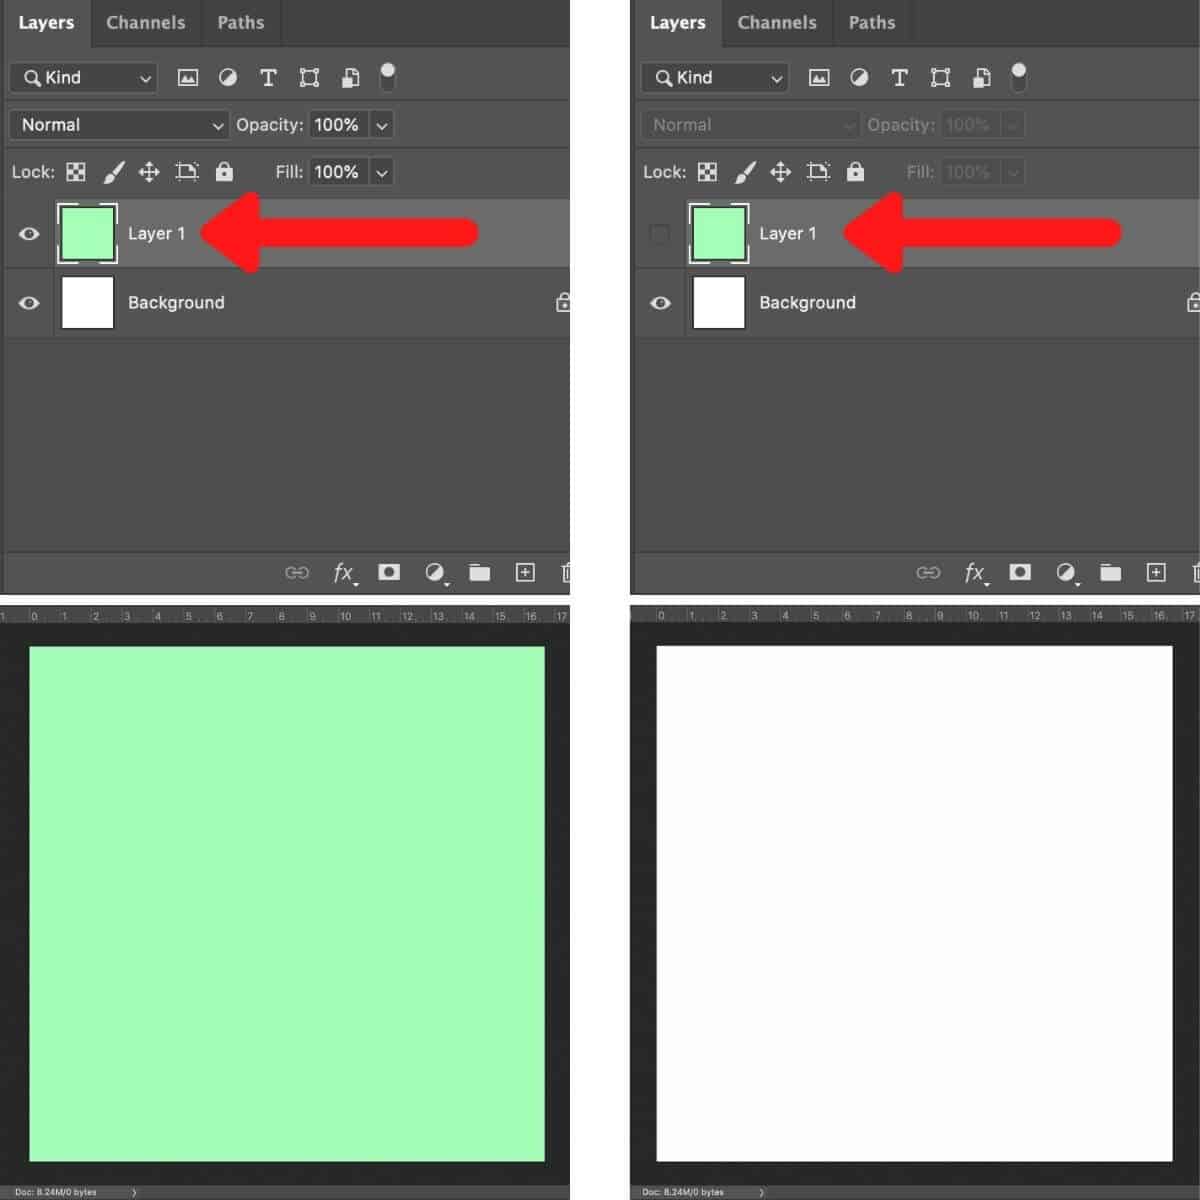
To hide a layer, press the eye icon, and it’ll be hidden. If you press it again, it’ll return.
In the example image, I set the new layer as green and the background layer as white. When you hide the green layer, it’ll disappear without affecting the white background.
The same is true when you hide an image or adjustment. It’ll be as if it never happened.
Duplicating a layer
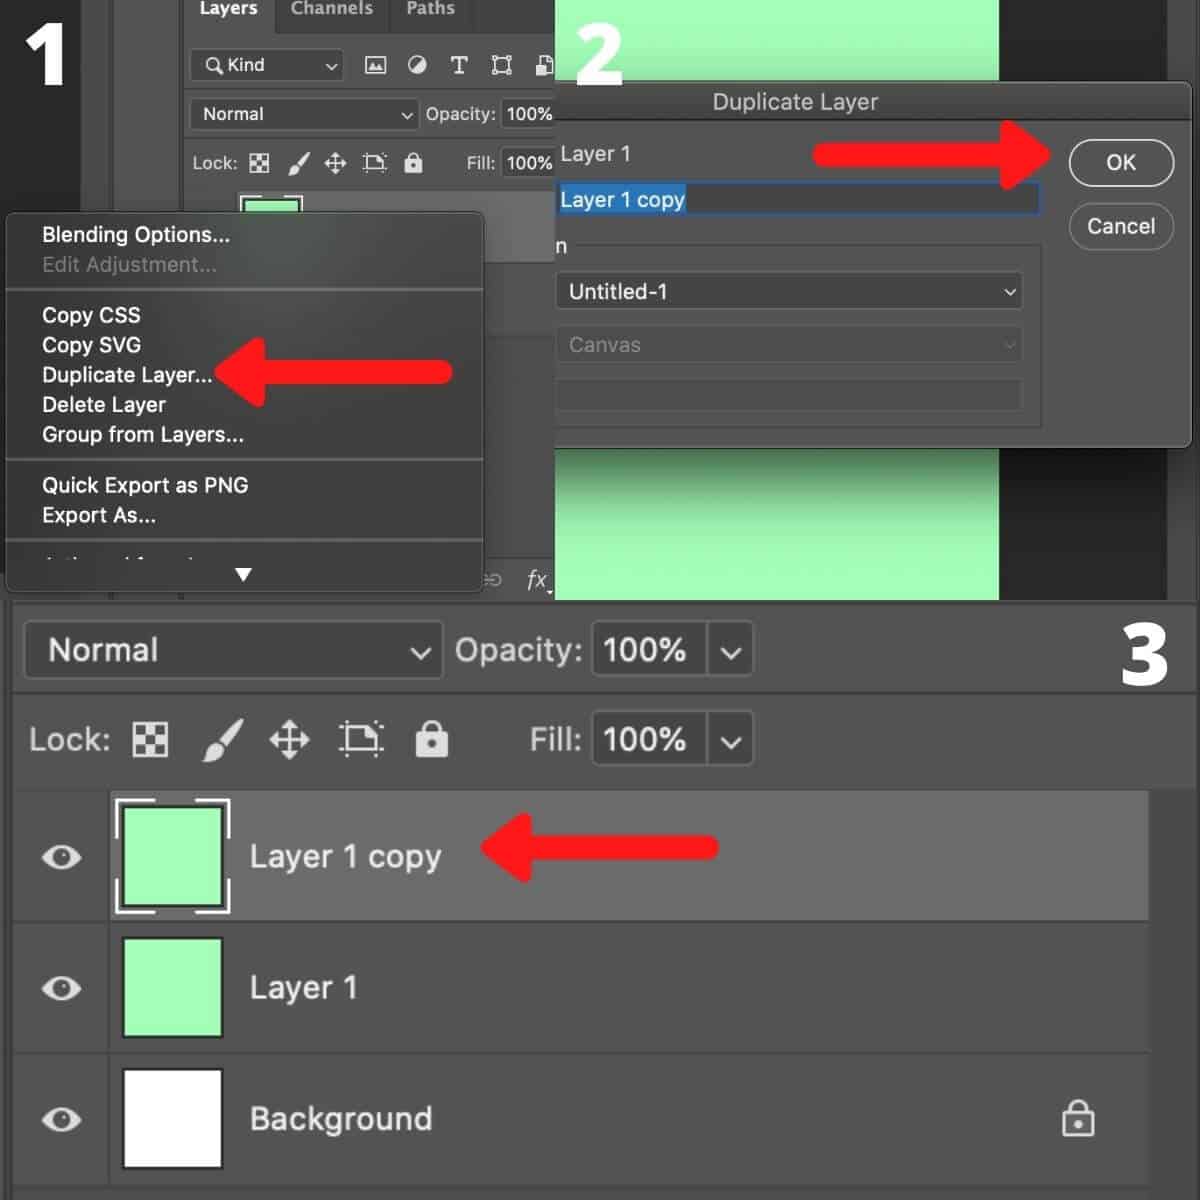
To duplicate a layer, take the following steps:
- Right-click on the layer that you want to duplicate.
- Name the duplicate.
- Press the OK button.
Deleting a layer
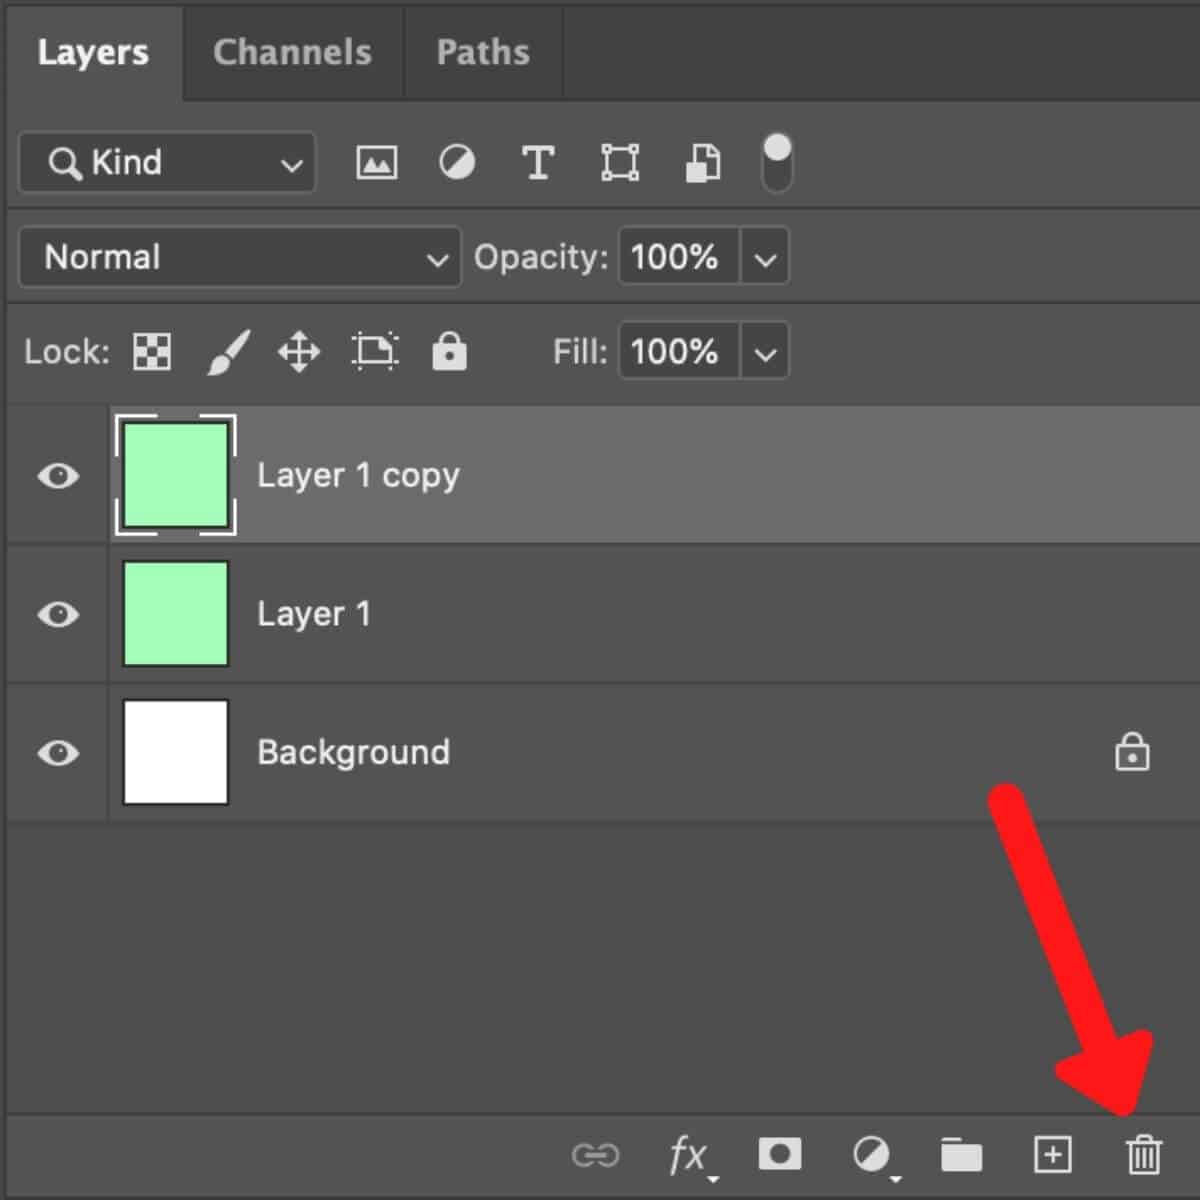
Delete a layer by pressing the trash can button at the bottom right of the Layers panel. You can also right-click the layer and press delete.
How to link and group layers
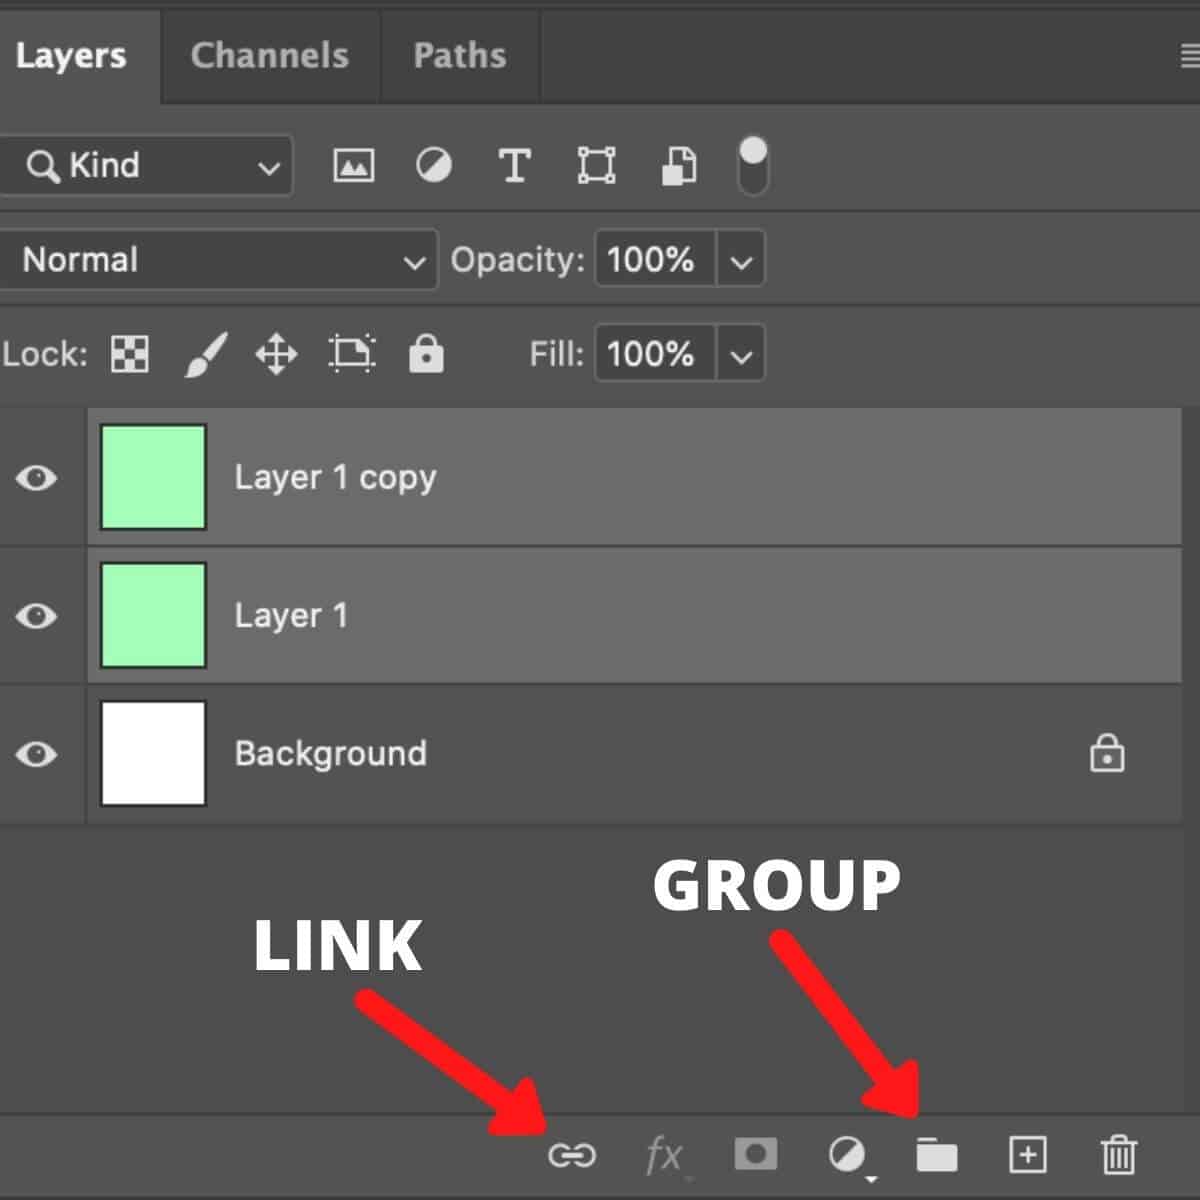
To link or group multiple layers, start by selecting them. On a Mac, you can press and hold Command, while you select the layers. For windows, press and hold Control as you select them.
To link the layers, press the link button on the left side of the panel. To group them, press the folder button.
When you link layers, the adjustments you make will apply to all of the layers that are linked.
Groups are another tool that’s primarily meant for organization. You can group together layers to help you stay organized when you’re editing.
Frequently asked questions
Can you copy and paste an image in Photoshop?
Yes, you can copy another image by copying it from the source or opening it in Photoshop, select the entire photo, and paste it onto the one you’re working on.
Can you move layers forward or backward?
Yes, press and hold the layer that you want to move. Then drag it up or down based on where you want it to be.
What’s the best way to combine images?
Photoshop has the Auto-Blend Layers command, which does a smooth job of combining images into one.
Conclusion
Learning how to use the layers in Photoshop will transform your images in post-processing. It’ll take time and plenty of practice to master the tool. However, it’s worth learning because of the benefits.
Featured image by David Em/Portraits Refined.
